How to Clean iPhone Speakers Safely: Step by Step
iPhone speakers collect pocket lint, skin oils, and fine dust that gradually muffle audio output. A regular cleaning routine using safe tools keeps sound quality high and prevents buildup that is much harder to remove later.
What You Need Before You Start
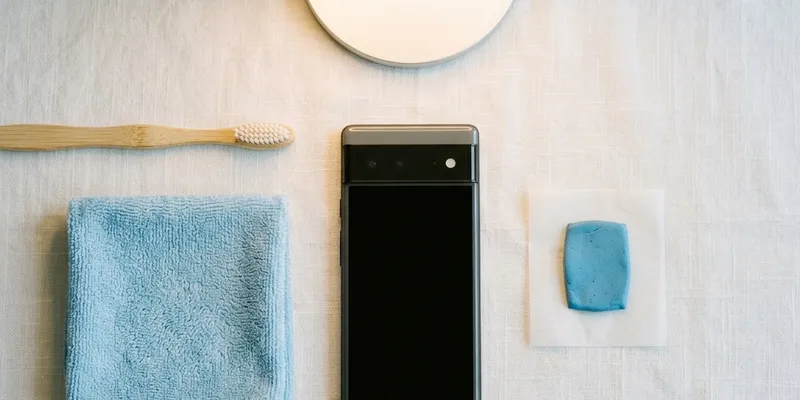
Gather a soft-bristle brush such as a clean, unused toothbrush with extra-soft bristles, a dry microfiber cloth, a wooden or plastic toothpick, and bright lighting or a magnifying glass. Avoid metal tools, compressed air cans, and any liquid cleaning agents for the speaker grille itself. Apple explicitly warns against using compressed air on iPhones because the high-pressure blast can damage the barometric vent and push debris deeper into the speaker enclosure.
Power the iPhone down or at least lock the screen before cleaning. This prevents accidental taps, Siri activation, or emergency calls while you are manipulating the phone. Removing the case gives you full access to both the bottom speaker grille and the earpiece grille at the top of the display. Inspect both grilles under bright light to identify where debris is concentrated before you start brushing.
If you wear latex or nitrile gloves during cleaning, make sure they are powder-free. Powdered gloves shed fine talc or cornstarch particles that can enter the speaker mesh and create the same kind of blockage you are trying to remove. Clean, dry hands are perfectly fine for this task.
Cleaning the Bottom Speaker Grille
Hold the iPhone with the bottom speaker grille facing downward so that gravity helps dislodged particles fall away from the phone rather than deeper into it. Brush across the grille with the soft-bristle brush using light, short strokes. Work from the center of the grille toward the edges, sweeping debris out of the speaker holes rather than pushing it side to side.
For stubborn buildup that does not come loose with brushing, use the tip of a wooden or plastic toothpick to gently lift compacted lint out of individual speaker holes. Do not press hard or scrape—the speaker mesh on iPhones is a fine metal weave bonded to the enclosure, and aggressive force can dent or detach it. Work one hole at a time and alternate between the toothpick and the brush.
After dry brushing, use a small piece of painter's tape or poster putty pressed lightly against the grille to pick up remaining fine particles. The low-tack adhesive pulls dust out of the mesh without leaving residue. Press and lift gently—do not rub or drag the tape across the grille, which can push adhesive into the holes.
Once the visible debris is cleared, play a speaker cleaner tone at 50 percent volume for 30 seconds to vibrate out any remaining micro-particles lodged deep in the mesh. Then test with a spoken-word podcast or audiobook at moderate volume. Speech is the best test material because muffled consonants and sibilants are immediately obvious, while music can mask subtle blockage.
Cleaning the Earpiece Speaker
The earpiece speaker sits behind a narrow slit at the top of the iPhone display, between the front camera and the Face ID sensors on models with the notch, or within the Dynamic Island area on iPhone 14 Pro and later. This grille is narrower than the bottom speaker and accumulates skin oils and makeup residue from being pressed against the face during phone calls.
Use the same soft-bristle brush, but switch to even lighter pressure because the earpiece grille is thinner and more delicate than the bottom speaker mesh. Brush along the length of the slit, not across it, to avoid bending the mesh. If you can see a visible film of oil or residue on the grille, lightly dampen a corner of the microfiber cloth with 70 percent isopropyl alcohol and wipe only the grille surface. Do not let any liquid drip into the slit.
Test the earpiece by making a phone call or playing audio through the earpiece using the Phone app. If the earpiece still sounds muffled after cleaning, the blockage may be behind the mesh where external cleaning cannot reach. In that case, a repair technician can remove the display assembly to access and clean or replace the earpiece module.
On iPhone 7 and later models, the earpiece doubles as the second stereo speaker during media playback. This means a dirty earpiece does not just affect call quality—it also reduces the treble and upper-midrange output during music, podcasts, and video. Cleaning both speakers restores the full stereo image that Apple's audio processing is designed to deliver.
Using Speaker Cleaner Tones Effectively
Speaker cleaner tones work by vibrating the speaker diaphragm at specific frequencies that physically shake loose particles from the mesh. Low-frequency tones in the 100 to 200 Hz range produce the largest diaphragm displacement and are most effective at moving dust and water. Higher frequencies above 500 Hz create faster but smaller vibrations that can dislodge finer particles embedded in the mesh weave.
Start with the phone held speaker-down and play the tone at 40 to 50 percent volume for 15 to 20 seconds. Then gradually increase to 70 percent volume if the initial pass did not produce visible improvement. Do not exceed 80 percent volume because the high amplitude can cause the diaphragm to bottom out against the speaker housing, potentially creasing the diaphragm material and introducing a permanent rattle.
A full cleaning session should include both a low-frequency pass and a high-frequency sweep. The low pass moves larger particles and any trapped moisture, while the high sweep clears fine dust from the mesh. Most web-based speaker cleaner tools offer both modes or a sweep that covers the full range automatically. Run the low pass first, then the sweep, then test with audio content.
After running the tones, let the speaker rest for a minute before testing at high volume. If you ran an aggressive session at high amplitude, the speaker diaphragm and voice coil need a moment to cool. Testing at full volume immediately after a cleaning session can make transient thermal distortion sound like a hardware problem when the speaker is actually fine.
How Often to Clean iPhone Speakers
For most users, cleaning iPhone speakers every two to four weeks is sufficient to maintain clear audio. If you work in a dusty environment—construction sites, woodworking shops, or bakeries with airborne flour—clean the speakers weekly. Pocket lint accumulation depends on the fabric of your clothing: denim and fleece shed far more fiber than synthetic athletic wear or cotton.
The earpiece grille needs more frequent attention than the bottom speaker if you make daily phone calls. Skin oils and foundation makeup build up after just a few days of pressed-to-face calling. Consider using speakerphone mode or wired earbuds for long calls to reduce direct contact between your face and the earpiece grille.
A quick test to check if cleaning is needed: play a familiar podcast at a comfortable volume and listen for any difference in clarity compared to how you remember it sounding. Volume creep—gradually turning the volume up over days because the speaker sounds softer—is a reliable signal that debris is accumulating. If you find yourself at 80 percent volume for content you used to hear clearly at 60 percent, it is time to clean.
Keep a dedicated soft-bristle brush in your desk drawer or nightstand. An unused extra-soft toothbrush works perfectly and costs less than a dollar. Having the tool within arm's reach makes quick cleanings effortless and prevents the kind of heavy buildup that requires more aggressive intervention.
What Not to Use on iPhone Speakers
Compressed air cans are the most commonly recommended but most problematic cleaning tool for iPhone speakers. The propellant in these cans—typically difluoroethane—exits the nozzle at high pressure and extremely low temperature. The pressure can push debris past the speaker mesh and into the enclosure, and the cold blast can cause condensation on internal components. Apple's official support page lists compressed air as something to avoid on all iPhone models.
Isopropyl alcohol should not be applied directly to the speaker mesh. While 70 percent isopropyl alcohol is safe for wiping the iPhone's glass surfaces, liquid entering the speaker grille can temporarily dissolve adhesives and swell the diaphragm material. If you use alcohol on a cloth to clean the area around the grille, wring the cloth until it is barely damp and keep it away from the mesh openings.
Sharp metal objects—sewing needles, safety pins, dental picks, and SIM ejector tools—should never be inserted into speaker holes. The speaker mesh on iPhones is approximately 0.1 millimeters thick, and a metal point can puncture or permanently deform it. Once the mesh is damaged, it no longer filters debris effectively, and the speaker becomes more vulnerable to future contamination.
Ultrasonic cleaning baths, which are popular for jewelry and dental tools, should not be used on iPhones or any sealed electronics. The ultrasonic vibrations can break adhesive seals, crack solder joints on internal components, and force water past the IP-rated gaskets. Even if the phone survives the bath, the water resistance rating is likely compromised afterward.